• Skip to main content
  • Skip to footer

Dr Jody Muelaner

simplifying complexity

  • Home
  • Writing
  • Design
  • Contact

Machine Tool

Improving Error Models of Machine Tools with Metrology Data

2017/01/09 by Jody Muelaner

Typically a machine tool is calibrated once a year to update the machine tool error model, at best! This will result in compensations which are less than optimal. There is however a better way, using data from measured parts and rapid checks capability can be greatly improved. Leverage the abundance of measurement data available in a modern production system to identify machine tool errors without down-time… You can download the full paper here.

Authors: J M Flynn, J E Muelaner, V Dhokia, S T Newman

Published in: Procedia CIRP, vol. 52, pages 204 – 209

Download the full paper: pdf link icon

Abstract: As the manufacturing community embraces the use of a variety of metrology solutions, the availability and quantity of measurement data is increasing. The tendency towards connectedness between manufacturing resources may also provide a mechanism for communication and exploitation of metrology data like never before. This research aims to provide an insight into the opportunities that are associated with accessible, abundant and communicable manufacturing metrology data. Issues are raised and critically discussed in relation to one particular aspect of manufacturing metrology, namely, machine tool accuracy verification and calibration. Specifically, a methodology for relating CMM part measurements to individual machine tool geometric error sources is described. A novel Monte Carlo simulation-based method is used to estimate previously unmeasured error values without the use of further testing. Using this method, the advantage of using previously captured verification and calibration data to identify likely causes of part defects is shown. It is envisaged that the proposed method can be used to instruct targeted machine tool verification and calibration routines to reduce the number of tests required to monitor a machine tool’s health. By using targeted tests, the need to measure all machine error sources is reduced, which in turn can improve productivity by reducing machine tool downtime.

Filed Under: Machine Tool

Rapid Machine Tool Verification developed for Rolls-Royce

2014/03/28 by Jody Muelaner Leave a Comment

This work, carried out for Rolls-Royce, developed novel methods of verifying that machine tools are capable of machining parts to within specification, immediately before carrying out critical material removal operations, and with negligible impact on process times. The primary method used is artefact probing using touch trigger probes. This enables all the kinematic errors in a machine tool to be verified within 1-minute using a fully automated cycle with all data stored and processed natively on the machine tool controller. The verification cycle can therefore be called up as a sub-routine within machining programs and if the machine is no longer capable the process will stop and signal for machine maintenance.

Download:

Title: Rapid Machine Tool Verification

By J E Muelaner, B R Yang, C Davy, M R Verma, P G Maropoulos
Presented at the 8th International Conference on Digital Enterprise Technology – DET 2014 – “Disruptive Innovation in
Manufacturing Engineering towards the 4th Industrial Revolution in Stuttgart, Germany, 26-28 March 2014.

Abstract: This paper describes work carried out to develop methods of verifying that machine tools are capable of machining parts to within specification, immediately before carrying out critical material removal operations, and with negligible impact on process times. A review of machine tool calibration and verification technologies identified that current techniques were not suitable due to requirements for significant time and skilled human intervention. A ‘solution toolkit’ is presented consisting of a selection circular tests and artefact probing which are able to rapidly verify the kinematic errors and in some cases also dynamic errors for different types of machine tool, as well as supplementary
methods for tool and spindle error detection. A novel artefact probing process is introduced which simplifies data processing so that the process can be readily automated using only the native machine tool controller. Laboratory testing and industrial case studies are described which demonstrate the effectiveness of this approach.

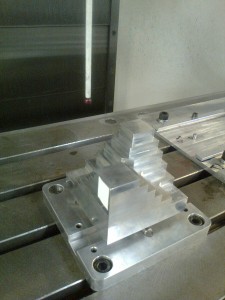
Artefact Probing
Artefact Probing
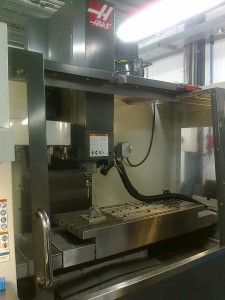
Machine Tool running Rapid Verification Process

Filed Under: Machine Tool

Footer

Terms and Conditions
Privacy Policy
  • Facebook
  • Twitter
  • Linkedin
  • Research Gate
  • Google+

Copyright © 2025 · Infinity Pro on Genesis Framework · WordPress · Log in